Some annuals make great dried flowers and are easy to grow from seed
Spring is here, in name at least! So it’s not too late to grow some of your own dried flowers this season. Prime contenders for drying are annual poppies (for their seed heads), annual larkspur (a relation of the delphinium), and corn and grass varieties. Annual seeds sown now may flower a little later (August as opposed to April-sown flowers which are likely to flower in July), but will be well worth it. Of course helichrysum and statice are two common dried flowers grown as annuals, but I tend to avoid them as arrangements can look rather dated.
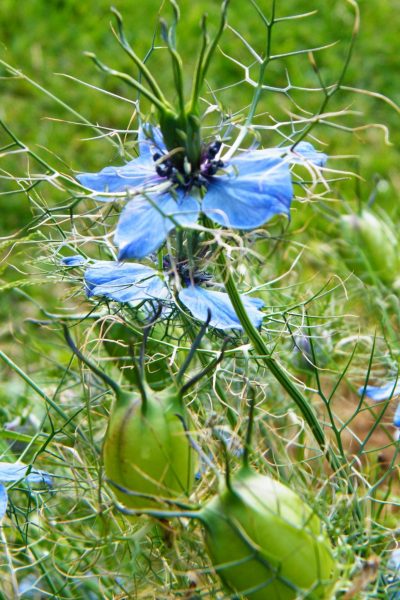
I have love-in-a-mist (nigella) in my garden, which makes a great dried flower for it’s seed heads. I can’t remember the last time I sowed seed – they just sow themselves round the garden.
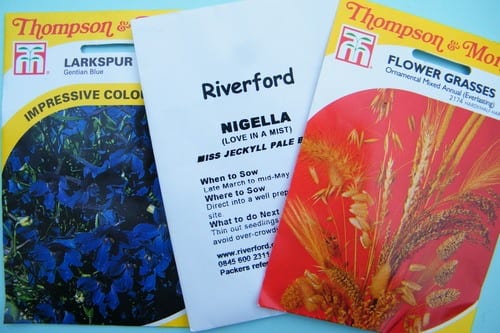
Growing your own dried flowers
1. Choose your seeds. I love browsing flower seeds, and usually come away from the garden centre with more than I can comfortably grow! Check the packets for sowing and flowering times. Hardy annuals are the easiest.
2. Sowing hardy annuals. The seed packet usually has all the information you need for successful cultivation. I usually sow them straight into the ground – rake the soil to a fine tilth, removing any large stones, then sow in rows to the depth and separation shown on the packet. If the seeds are sown in rows, it’s easier to spot the weeds! Plus, I always sow them more thickly than stated on the packet as my garden is infested with slugs and snails. Water in gently using a rose on your watering can to prevent the seeds washing away.
3. Flowering. As a generalisation, annuals tend to flower about 12 weeks after germination, so keep well watered and wait for the display!
4. Drying. Try and catch the flowers, pods and grasses at their best, as they are likely to deteriorate slightly on drying, and any imperfections will be more obvious. Cut in early morning to avoid heat stress, tie in small bunches with a rubber band, and hang up somewhere warm, dark and dry (such as an airing cupboard) for a couple of weeks. (A rubber band shrinks with the plant stems, so they don’t fall out of the bunch).
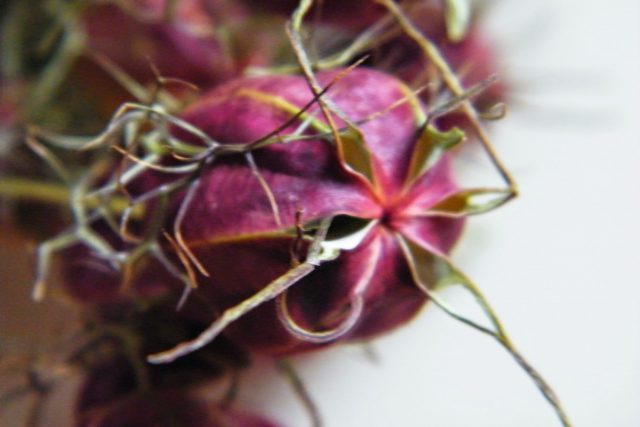
The photo above shows how beautiful a nigella pod can look once dried.
I’ve written various posts on how to dry flowers, so why not have a look at one of these for some hints and tips:
Drying flowers at home
Drying flowers at home
Shopping links for dried flower bunches
Dried flower bunches are easily sourced online. Here is a selection similar to the ones mentioned above: delphinium flowers, phalaris (canary) grass, wheat stems, nigella pods which can all be purchased via my shop daisyshop.co.uk shown below: